
Out of range error on monitor
Out of range error on monitor
In this article, we look
at the Out of Range error and solution suggestions that users often encounter.
Our computers don’t
always stay the same. It can change over time, both in terms of hardware and
software. When you receive a new monitor, switch to a new video card, or
install a new driver, you may encounter various errors.
One of the most common
errors in this regard is the Input Signal Out of December error, which you may
encounter on almost most systems. Fortunately, you can solve the problem quite
easily with one of the methods we will show below.
What
caused the Out of Range error?
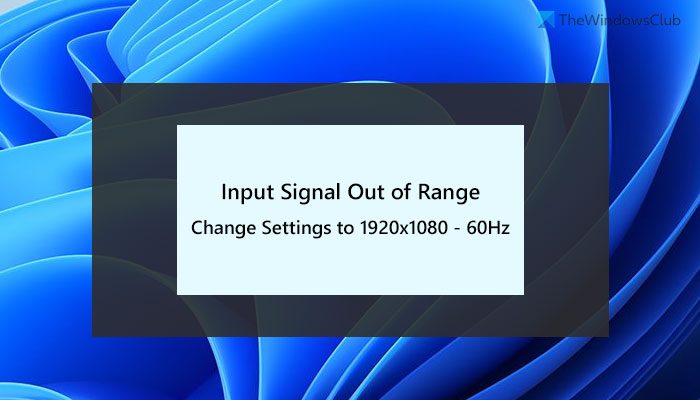
For example, setting your
system to display at a resolution of 2560×1440 while your monitor supports
resolutions up to 1920×1080 will result in an out of Range error.
High
Hz Problem
Another reason for this
error is that the selected refresh rate is higher than the monitor supports.
For example, if you give a 60 Hz monitor a 75 Hz refresh rate, you will not
receive an image. In short, if the monitor cannot be synchronized with the
video card in terms of refresh rate, the “out of Range” error is inevitable.
If the error message is
displayed on a secondary screen, go to Windows display properties and change
the resolution setting of the secondary screen to a lower setting until the
image is displayed. The most ideal for monitors is to use their native
resolutions and refresh rates. Going beyond these values will cause an Out of
Range error, as well as problems in games.
For this reason, it is
recommended to use the natural resolution of the monitor unless it is
difficult. Native resolution is usually written among the characteristics of
the monitor. For example, if your monitor is 1080p, its native resolution is
1920 x 1080. 1440p will be 2560 x 1440, and 4K will be 3840 x 2160.
Change
the screen refresh rate or resolution in Safe Mode
Most Windows, MacOS, and
Linux distributions include a precautionary mechanism in case the user chooses
a value other than the monitor’s native values. As many of you have noticed,
when you change the resolution or refresh rate of the monitor, the operating
system asks you to approve the change within a certain period of time. If a
problem has occurred and the screen cannot be displayed, you cannot confirm the
change during this time. So the operating system automatically reverts to the
old Settings. But things aren’t always that easy.
If you have installed a
new video card or changed certain settings, installed a new driver, or run a
new system for the first time, one of the possible problems that may occur may
be that the video card or computer is set to run at a higher refresh frequency
or resolution than the monitor can remove. In addition, the operating system’s
protection mechanism, which we mentioned above, may not work in such cases. As
a result, this causes a disturbing error.
This problem is most common
among laptop users with smaller monitors. The best way to solve the problem is
to start your computer in Safe Mode and change these settings.
Change
monitor settings with Safe Mode
Safe Mode is an emergency
mode that allows the Windows operating system to run with minimal settings,
drivers, and programs. In this way, faulty driver installations, application
and System Settings made by the user that prevent the system from starting in a
healthy way can be deactivated so that the user can access Windows and correct
the settings. In a situation where the main monitor does not display, there are
three basic methods to achieve Safe Mode:
1. access Safe Mode by
connecting a second monitor
This method allows you to
access Safe Mode without creating a boot drive if you have a second monitor.
Follow the steps to do this:
Connect the second
monitor to your computer
Turn on your system. When the screen arrives, open the Start menu.
While holding down the Shift key, click Restart.
Wait until” continue“,” troubleshooting“,” shut down your computer ” options
appear.
Follow troubleshooting – > Startup Settings and press restart
When your computer starts, you can select the option that allows you to start
the computer in low-resolution video mode.
Remove the second monitor and install the main monitor.
You’re In Safe Mode Now.
2. accessing safe mode
using the Windows Boot Drive
However, since our access
to Windows is limited because our monitor is not working, we need to try
another way to switch to Safe Mode.
Insert a bootable Windows
USB or DVD into your computer and start it. If you don’t have an original USB
or DVD, you can make a Windows 10 installation USB using our guide:
UEFI Windows 10 Installation Guide
Boot from the drive you just installed.
On the Windows Setup start screen, enter the language, time, and keyboard
properties. Then click the next button.
On the next screen, select Repair Your Computer. Please then follow the steps:
Select troubleshooting -> Advanced Options – > Startup Settings.
To select Start in Safe
Mode, option four, press 4 or F4 on your keyboard
You’re In Safe Mode Now.
Safe
Mode Operations
1.
After the computer
restarts and turns on in Safe Mode, right-click on your desktop and select
Display Settings. Go to the Settings tab, and on the resolution tab, adjust the
settings that are appropriate for your monitor. Be sure to synchronize the
setting with your monitor’s native resolution to see if the problem is
resolved. Then, try restarting your computer in normal mode.
2.
If nothing about
resolution settings has solved the problem: go back to Safe Mode, right-click
on your desktop and select Properties – > Settings tab – > Advanced, and
then go to the Monitor tab. If the refresh rate is set too high, try lowering
it slightly. Note that the lowest recommended setting is 60 Hz. The natural
refresh rate of most panels is 60 Hz, so you can try the v
3.
Check if the problem is
resolved.
Uninstall
or update existing graphics drivers
The first solution is
quite popular and simple among users who are struggling with this terrible
error. But sometimes this simple setting is not enough, and you still need to
continue troubleshooting using Safe Mode. You will also need your Windows 10
bootable USB drive created in the previous method again.
1.
Boot the computer from a
USB memory stick or DVD, as described in the previous step, and start it in
Safe Mode.
2.
Make sure you have a
network connection, as we will update the drivers.
3.
In the Start Menu, type
Device Manager and click Enter.
4.
Open the Display adapters
category. Right-Click your graphics card and select Update Driver. If you have
started normal safe mode without a network connection, select Remove Device and
skip Step five.
5.
Select Search for driver
software automatically and follow the on-screen instructions to install it.
6.
Restart your computer
normally and check that the problem is resolved. If you have removed the drive,
Windows must search for and install the drive when booting.
7.
If your problem is
solved, download and install the latest driver for your card and operating
system from the manufacturer of your video card.
Delete
and reinstall the video card driver with DDU
Display Driver
Uninstaller (DDU) is a useful tool that clears the way for a clean driver
installation by deleting registry and driver files that accumulate after
different monitors that connect to the computer over time, drivers that are
updated in a row, and Windows updates.
Often conflicting or
incorrectly installed driver problems can also lead to resolution and refresh
rate problems. For this reason, removing graphics drivers and performing a
clean installation can be important for my more stable and comfortable subject.
With DDU, you can remove
the driver of your video card with the help of the driver removal guide,
download the current driver from your video card’s site, and reinstall it
cleanly.
Additional
Methods
If these methods do not
work, you can physically remove your video card from the system, try to start
the system with an internal video card, if any, or try to open the system with
another video card.
Problems with your
monitor cables can also cause an” Out of Range ” error. Therefore, make sure
that your cables are intact and working properly. Experiment with different
cables if necessary.
BIOS
reset method
One of the suggestions
for such errors is the” BIOS reset ” option. But this method will not help
solve the error, nor can it lead to the system not being fully turned on.
Because the special settings you make from the BIOS and necessary to turn on
the system can be deleted if you reset the BIOS.
Post a Comment for "Out of range error on monitor"